

As an adult, 50 things are not so simple... With two toddlers, a job, a husband, family to take care of and a sometimes overwhelmingly long to do list, adding one more thing to think about seemed to be too much. I'd like to let you in on a little secret - being Earth Minded and Health Conscious is actually EASY! Here are 7 ways you can incorporate a greener approach into your lifestyle. Start out with just a few and add steps once you get the hang of the last thing!
1. Re-Use
Possibly one of the most simple suggestions I have is to find ways to ditch the disposables - paper plates, ziploc bags, and the like all contribute to growing landfills and pollution. Making 4 lunches everyday can use a LOT of ziplocs! Reusable containers that are washable are a great alternative - they last far longer, better for the environment and even keep your food from getting squished - win, win, win!
2. Reduce
I have to admit, this is a hard one for me as I am a shopaholic. But it is the one I am working hardest on now. When you are at the store, putting something in your shopping cart - are you buying that item because you can not picture your home without it, or because it has that awesome orange clearance sticker and you can't help yourself? Reducing the amount of things we buy means less packaging and less trash. And better yet, buying something used (Hello, awesome barely used kids clothing!) means that those items are cycling through another home and staying out of the dump, too!
3. Recycle
The three R's - are you with me? If you live in a city with a recycling program, I highly recommend you utilize this. At Casa de Dodd, we have 2 trashcans in the kitchen - one for garbage and one for recycling. We recycle far more than we actually toss, and I am proud of that. It doesn't take too much extra space and does a world of good for the environment.
4. Compost
There are some fantastic tools and resources to help you compost, but it is very easy to get started on your own. All of your veggie kitchen scraps go into a pile. Layer with "dry" ingredients (ie: yard clippings, leaves, etc), turn occasionally to encourage decomposition, and use this in your garden and flower pots to encourage growth. We keep a bowl with a lid in our kitchen for scraps so we don't have to go out to the compost pile every night. In my opinion, anything we can do to keep trash piles small, we should do.
5. Join a Co-Op
Several years ago, Urban Acres opened a co-op in our neighborhood. Organic, locally grown veggies - this is a beautiful thing. Do you know how munch junk is on the fruits and veggies that you buy at the grocery store? If you aren't buying organic, what you are putting in your body might astound you. In a recent study, 42 different pesticide residues were found in and on a sample of apple. Seven of those are known or probable carcinogens, 19 are suspected hormone disruptors, 10 are neurotoxins, 6 are developmental or reporductive toxins and 17 are honeybee toxins. And let's not even start the discussion on GMO's. What we put in our bodies is important, and I certainly do not want neurotoxins on my daughter's plate. There are Vegetable Co-Ops all over the nation - multiple in Dallas, Texas - we are blessed. We pay $30 every other week for a bin of produce that is between 15-30 pounds. We would pay this much or more for the same fruits and veggies in the grocery store, and there is certainly something to be said for knowing where your food comes from (the farmer, not the store!).
 6. Laundry
It's interesting to me that the things that we use to clean our clothes, the items that are literally touching our skin at all times, are chock full of junk. The skin is our largest organ, and everything that we put on our skin is absorbed. Sodium lauryl sulfate (SLS)/sodium laureth sulfate (SLES), 1,4-dioxane, NPE (nonylphenol ethoxylate), Phosphates - if you can't pronounce it and don't know what it is, do you want to bring gallons of it into your home? "Not only are these chemicals potentially damaging to your health, but they are also contaminating waterways and harming the environment." - Dr. Mercola. Changing the way we do laundry was one of the easiest changes we have made in our home. We are not fully crunchy and have not made our own laundry detergent, but by being a savvy shopper, we can choose store-bought products that are less harmful to ourselves and our environment. We use Seventh Generation laundry soap and oxyclean substitute, and white vinegar in place of fabric softener. Our laundry gets squeaky clean (is that possible for laundry?), smells great, with no hint of vinegar smell. The cost is similar to using traditional brands - the detergent is slightly more expensive, but since you aren't using fabric softener, you save money on that side.
7. Cleaning
Change the way you clean your house. Know how I was just talking about bringing gallons of chemicals into your home? Yeah, that is what I have done all my life until recently. 47 products under my sink, with a child proof lock on it, to clean everything from the fridge to the toilet to the tv to the counters... it's just out of hand. Certain cleaning products cause an asthmatic reaction in myself and I dare not use them around my children. There is a better solution! Water, vinegar and Essential Oils are an easy, much more health conscious way to clean your home. You will be amazed at how wonderful your home smells... and how sparkling clean it can get!
Now... choose one. Start somewhere. If we keep doing what we are doing, what will our children's world be like? A scary thought. In the wise word of the Lorax, "Unless someone like you cares a whole awful lot, nothing is going to get better, it's not."
Stay tuned for future ideas and resources!
Possibly one of the most simple suggestions I have is to find ways to ditch the disposables - paper plates, ziploc bags, and the like all contribute to growing landfills and pollution. Making 4 lunches everyday can use a LOT of ziplocs! Reusable containers that are washable are a great alternative - they last far longer, better for the environment and even keep your food from getting squished - win, win, win!
2. Reduce
I have to admit, this is a hard one for me as I am a shopaholic. But it is the one I am working hardest on now. When you are at the store, putting something in your shopping cart - are you buying that item because you can not picture your home without it, or because it has that awesome orange clearance sticker and you can't help yourself? Reducing the amount of things we buy means less packaging and less trash. And better yet, buying something used (Hello, awesome barely used kids clothing!) means that those items are cycling through another home and staying out of the dump, too!
3. Recycle
The three R's - are you with me? If you live in a city with a recycling program, I highly recommend you utilize this. At Casa de Dodd, we have 2 trashcans in the kitchen - one for garbage and one for recycling. We recycle far more than we actually toss, and I am proud of that. It doesn't take too much extra space and does a world of good for the environment.
 |
| (source) |
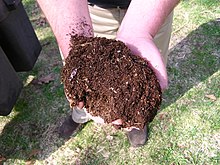
4. Compost
There are some fantastic tools and resources to help you compost, but it is very easy to get started on your own. All of your veggie kitchen scraps go into a pile. Layer with "dry" ingredients (ie: yard clippings, leaves, etc), turn occasionally to encourage decomposition, and use this in your garden and flower pots to encourage growth. We keep a bowl with a lid in our kitchen for scraps so we don't have to go out to the compost pile every night. In my opinion, anything we can do to keep trash piles small, we should do.
5. Join a Co-Op
Several years ago, Urban Acres opened a co-op in our neighborhood. Organic, locally grown veggies - this is a beautiful thing. Do you know how munch junk is on the fruits and veggies that you buy at the grocery store? If you aren't buying organic, what you are putting in your body might astound you. In a recent study, 42 different pesticide residues were found in and on a sample of apple. Seven of those are known or probable carcinogens, 19 are suspected hormone disruptors, 10 are neurotoxins, 6 are developmental or reporductive toxins and 17 are honeybee toxins. And let's not even start the discussion on GMO's. What we put in our bodies is important, and I certainly do not want neurotoxins on my daughter's plate. There are Vegetable Co-Ops all over the nation - multiple in Dallas, Texas - we are blessed. We pay $30 every other week for a bin of produce that is between 15-30 pounds. We would pay this much or more for the same fruits and veggies in the grocery store, and there is certainly something to be said for knowing where your food comes from (the farmer, not the store!).

It's interesting to me that the things that we use to clean our clothes, the items that are literally touching our skin at all times, are chock full of junk. The skin is our largest organ, and everything that we put on our skin is absorbed. Sodium lauryl sulfate (SLS)/sodium laureth sulfate (SLES), 1,4-dioxane, NPE (nonylphenol ethoxylate), Phosphates - if you can't pronounce it and don't know what it is, do you want to bring gallons of it into your home? "Not only are these chemicals potentially damaging to your health, but they are also contaminating waterways and harming the environment." - Dr. Mercola. Changing the way we do laundry was one of the easiest changes we have made in our home. We are not fully crunchy and have not made our own laundry detergent, but by being a savvy shopper, we can choose store-bought products that are less harmful to ourselves and our environment. We use Seventh Generation laundry soap and oxyclean substitute, and white vinegar in place of fabric softener. Our laundry gets squeaky clean (is that possible for laundry?), smells great, with no hint of vinegar smell. The cost is similar to using traditional brands - the detergent is slightly more expensive, but since you aren't using fabric softener, you save money on that side.
7. Cleaning
Change the way you clean your house. Know how I was just talking about bringing gallons of chemicals into your home? Yeah, that is what I have done all my life until recently. 47 products under my sink, with a child proof lock on it, to clean everything from the fridge to the toilet to the tv to the counters... it's just out of hand. Certain cleaning products cause an asthmatic reaction in myself and I dare not use them around my children. There is a better solution! Water, vinegar and Essential Oils are an easy, much more health conscious way to clean your home. You will be amazed at how wonderful your home smells... and how sparkling clean it can get!
Now... choose one. Start somewhere. If we keep doing what we are doing, what will our children's world be like? A scary thought. In the wise word of the Lorax, "Unless someone like you cares a whole awful lot, nothing is going to get better, it's not."
Stay tuned for future ideas and resources!


