Sep 30, 2013

Why Art

I am a woman who wears many hats - wife, mom, sister, daughter, artist, teacher....

Artist is the hat for which I have received the most training and get the least recognition, haha. But I can not help myself, I love it.

Several times, I have had people ask me if I hope my children become artists when the grow up. My answer is always the same - I hope my children become whatever they WANT to become. However, I do hope that I raise my children with an appreciation for the arts.


Here are 5 reasons I believe it is of the upmost importance to expose our children to art:

1. Imagination

Albert Einstein said it well - "Imagination is more important than knowledge." Why would it be that one of the greatest minds in history would say this? Without imagination, how would we think up new, innovative ideas? How would we dream up the next iPhone or solve hard moral conundrums. I have been a teacher for 8 years now, and I can tell you that some of my favorite students, and some of the students that I have seen succeed since graduating are not the students who can memorize chapters in the math book and they are not the ones who necessarily outperformed others on tests and quizzes - they are the students who know how to think outside the box, who look for unusual ways to solve problems. This is what our current generation is lacking. Our children need time to be creative - outside playtime, art classes, dance and kinestetic learning opportunities.


The imagination of a child is an incredible thing. This afternoon, we were painting pictures to send to our loved ones and Isabel put one single dot on a piece of paper and said in all seriousness, "This is one dot. It is for Grandpa." I asked if she wanted to add anything to the image, and she said no, it was finished. What an imagination! If not fostered, this kind of thinking is crushed out of too many people. Imagine if every adult had the confidence and imagination of a 2 year old.
2. Global Thinking

When was the last time you stepped into the Art museum? Bathed in that experience? When you looked around, what did you see? More than likely, you saw lots of different kinds of people, art from throughout history, art from other cultures... Exposing our kids to art is one of the most valuable ways to teach them history from everyday people's experiences and from a wide range of perspectives. We are extremely lucky in Dallas to be surrounded by world class museums (art, history, science, etc). I relish in the fact that I can take my kids to 10 different museums and show them so many beautiful things and let them jump into the images and imagine themselves in another culture, even if only for a moment.

3. Escape

When we were children, life wasn't as hard as it is for today's children. They are faced with alarmingly difficult situations on a daily basis - ever changing technology, sex drugs and rock n' roll in their face 24/7, divorce at an all time high, financial issues of their parents... When do our children get the chance to be children? Even for my high school students, I pray that my art class is a chance for them to escape the fear of the grade they got on that test, or the demands of sports and drama and clubs on top of classes, or the drama that is going on at home and just BE in the moment. Being absorbed into an art project is one of the most freeing, soul soothing activities I can imagine. As Twyla Tharp said, "Art is the only way to run away without leaving home." I find this to be an incredibly poignant idea.

4. Gives Us A Voice

“Art enables us to find ourselves and lose ourselves at the same time. " - Thomas Merton
As I said earlier, the youth of today has it rough. They are being forced to grow up quickly, to face real, hard truths. Some of them rise to this expectation, and some turn and act out - seeking acceptance in negative ways. As a teen, one thing that art gave me was a voice when I thought no one was listening (whether this be true or not, it was how I felt at times, and I imagine nothing has changed in today's kids). I was able to escape into my painting and, I believe, turned into a much stronger adult than if I did not have that voice to discover.
On a lighter note, art also gives voice to the voiceless. This is a truly amazing thing. My 18 month old, Olivia, can color something and be absolutely ecstatic to show me her creation. This is HER voice. I do not think that she is simply scribbling lines on a paper.


5. Encourages Independence

Art was one of the first activities that Isabel was able to do by herself. We have an art table in our dining room, supplies on a shelf, and a place for her to display her work. She learned to peel stickers from pages, to choose colors, and even to clean up after herself. This inspired confidence in her. She learned all her letters with ABC stickers, she learned animals and the sounds animals make with a Discovery coloring book... For her, art has been a way to grow.

Without art, we become bland, single-minded individuals with no connection. Art is a bridge to a life we would not otherwise experience.

Sep 27, 2013

Why I Started Using Essential Oils

Within the past 6 months, my family has discovered and adopted essential oils for a myriad of uses from home cleaning to health. This has been an absolutely fascinating journey and I feel compelled to share with you what I have learned.

Over the next few weeks, I will be showcasing some of my favorite oils.

My family uses Young Living Essential Oils. There are lots of reasons for that decision, but that is a post for another day.

My sweet Isabel is nearly 3 years old. Up until the beginning of the summer, she has woken 1-2 times every night. This mama was beyond exhausted - I never got a full night's sleep and Izzy was often cranky and hard to get along with because her sleep was being interrupted, too.

And then, my friend Jilian, introduced me to Peace and Calming.


This was the game changer.

We started diffusing this in the girls' room at night and like magic, both girls are sleeping through the night, often 12+ hours. I did not believe it at first - born skeptic. So, we ran out... again with the waking. Seriously, this stuff is for real.

Peace and calming is good for calming tantrums, promoting a peaceful environment, getting to sleep and staying to sleep. This is one thing that I plan to never be without again.

Stay tuned for more awesome oily information!

Want to know how to purchase your own oils?  Check out my informational page here! 

Sep 24, 2013

Seven Simple Things You Can Do To Green Your Home

When I was a kid, one of my very favorite books was 50 Simple Things Kids Can Do To Save The Earth.  I loved all of the ideas, I loved how empowered I felt by reading and doing these things.  I started a Recycling Club at my elementary school (and at my high school, and sponsored one as a teacher!). 


As an adult, 50 things are not so simple... With two toddlers, a job, a husband, family to take care of and a sometimes overwhelmingly long to do list, adding one more thing to think about seemed to be too much.  I'd like to let you in on a little secret - being Earth Minded and Health Conscious is actually EASY! Here are 7 ways you can incorporate a greener approach into your lifestyle.  Start out with just a few and add steps once you get the hang of the last thing!

1.  Re-Use
Possibly one of the most simple suggestions I have is to find ways to ditch the disposables - paper plates, ziploc bags, and the like all contribute to growing landfills and pollution.   Making 4 lunches everyday can use a LOT of ziplocs!  Reusable containers that are washable are a great alternative - they last far longer, better for the environment and even keep your food from getting squished - win, win, win!

2.  Reduce
I have to admit, this is a hard one for me as I am a shopaholic.  But it is the one I am working hardest on now.  When you are at the store, putting something in your shopping cart - are you buying that item because you can not picture your home without it, or because it has that awesome orange clearance sticker and you can't help yourself?  Reducing the amount of things we buy means less packaging and less trash.  And better yet, buying something used (Hello, awesome barely used kids clothing!) means that those items are cycling through another home and staying out of the dump, too!

3.  Recycle
The three R's - are you with me?  If you live in a city with a recycling program, I highly recommend you utilize this.  At Casa de Dodd, we have 2 trashcans in the kitchen - one for garbage and one for recycling.  We recycle far more than we actually toss, and I am proud of that.  It doesn't take too much extra space and does a world of good for the environment.

(source)


4.  Compost
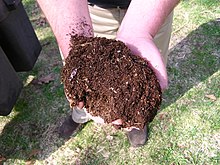
There are some fantastic tools and resources to help you compost, but it is very easy to get started on your own.  All of your veggie kitchen scraps go into a pile.  Layer with "dry" ingredients (ie: yard clippings, leaves, etc), turn occasionally to encourage decomposition, and use this in your garden and flower pots to encourage growth.  We keep a bowl with a lid in our kitchen for scraps so we don't have to go out to the compost pile every night.  In my opinion, anything we can do to keep trash piles small, we should do.

5.  Join a Co-Op
Several years ago, Urban Acres opened a co-op in our neighborhood.  Organic, locally grown veggies - this is a beautiful thing.  Do you know how munch junk is on the fruits and veggies that you buy at the grocery store?  If you aren't buying organic, what you are putting in your body might astound you.  In a recent study, 42 different pesticide residues were found in and on a sample of apple. Seven of those are known or probable carcinogens, 19 are suspected hormone disruptors, 10 are neurotoxins, 6 are developmental or reporductive toxins and 17 are honeybee toxins. And let's not even start the discussion on GMO's.  What we put in our bodies is important, and I certainly do not want neurotoxins on my daughter's plate.  There are Vegetable Co-Ops all over the nation - multiple in Dallas, Texas - we are blessed.  We pay $30 every other week for a bin of produce that is between 15-30 pounds.  We would pay this much or more for the same fruits and veggies in the grocery store, and there is certainly something to be said for knowing where your food comes from (the farmer, not the store!).

6.  Laundry
It's interesting to me that the things that we use to clean our clothes, the items that are literally touching our skin at all times, are chock full of junk.  The skin is our largest organ, and everything that we put on our skin is absorbed.  Sodium lauryl sulfate (SLS)/sodium laureth sulfate (SLES), 1,4-dioxane, NPE (nonylphenol ethoxylate), Phosphates - if you can't pronounce it and don't know what it is, do you want to bring gallons of it into your home?  "Not only are these chemicals potentially damaging to your health, but they are also contaminating waterways and harming the environment." - Dr. Mercola.  Changing the way we do laundry was one of the easiest changes we have made in our home.  We are not fully crunchy and have not made our own laundry detergent, but by being a savvy shopper, we can choose store-bought products that are less harmful to ourselves and our environment.  We use Seventh Generation laundry soap and oxyclean substitute, and white vinegar in place of fabric softener.  Our laundry gets squeaky clean (is that possible for laundry?), smells great, with no hint of vinegar smell.  The cost is similar to using traditional brands - the detergent is slightly more expensive, but since you aren't using fabric softener, you save money on that side.

7.  Cleaning
Change the way you clean your house.  Know how I was just talking about bringing gallons of chemicals into your home?  Yeah, that is what I have done all my life until recently.  47 products under my sink, with a child proof lock on it, to clean everything from the fridge to the toilet to the tv to the counters... it's just out of hand.  Certain cleaning products cause an asthmatic reaction in myself and I dare not use them around my children.  There is a better solution!  Water, vinegar and Essential Oils are an easy, much more health conscious way to clean your home.  You will be amazed at how wonderful your home smells... and how sparkling clean it can get! 

Now... choose one.  Start somewhere.  If we keep doing what we are doing, what will our children's world be like?  A scary thought.   In the wise word of the Lorax, "Unless someone like you cares a whole awful lot, nothing is going to get better, it's not." 

Stay tuned for future ideas and resources!


Jan 18, 2013

Science + Art = Magic

Alright, confession time. I am a lazy mom. Entertaining kids all day is exhausting, especially when your oldest has the attention span of a... Well, a 2 year old. I am constantly on the lookout for entertaining, inexpensive projects to do with Isabel that will hold her attention for more than 30 seconds. Baby has had the flu this week, Isabel is on her second ear infection in a month, and I'm home with them today since they can't go to school and Nana is sick, too.

A while ago, I was inspired by my natural method of cleaning the drain in my kitchen sink - baking soda and vinegar. Baking soda is actually sodium bicarbonate , which, when dissolved in water separates into sodium and bicarbonate ions. Vinegar is acetic acid mixed in a solution of water. So, when you add vinegar to baking soda, you get an interesting reaction. (It's slightly more complicated than I wish to describe here, but if you want to know the full story, check out this great explanation here )

So, a little vinegar dropped into baking soda makes a big fizzle, and in turn, captures the attention of a two year old who has not been still for more than a millisecond the entire time I have been typing this explanation.

What you will need for this "experiment":
- 9x13 baking dish
- baking soda
- vinegar (I had a large bottle of regular on hand, but perhaps apple cider vinegar might smell a little better)
- food coloring
- small bowls
- droppers (found them on amazon for about $5 for 12, but I had a couple old baby medicine dispensers that worked great)
- apron or large shirt to protect your clothing as food coloring is hard to get out

Line the bottom of the baking dish with a thin layer of baking soda.
In the small bowls, mix a little vinegar (maybe 1/4 cup) with a few drops of food coloring.
Once your kiddo's clothes are sufficiently protected, put the baking dish in front of them with the small bowls of colored vinegar.
Teach them how to suck the liquid into the droppers and then drop it onto the baking soda and watch it fizz!

If you have small ones, this does require some adult supervision. While the ingredients themselves are not dangerous, the food coloring has a tendency to stain. Isabel got a little too excited and started shaking the dropper and it got all over her little table and even a few drops on her face. A few of her fingers were blue after our project, too.

Biggest downside to this project? When it has to end! When the baking soda got all soggy and baby was fussing because she wasn't getting attention and we had to put it away, Isabel cried and cried for more magic. Boy do I know how she feels...

Anyway, this is a great summer project for outside, or for the cooped up days of winter. I can't imagine a child who wouldn't enjoy this - even this mama thought it was pretty great.

Jan 12, 2013

Delicious Organic Side Dishes

I wouldn't call it a New Year's Resolution, but lately Drew and I have really been trying to feed our family with better quality ingredients, more real foods, less food from boxes or cans.

2 weeks ago, a Groupon came through my email for a local produce co-op, Urban Acres. We were members several years ago before our kids were born, but needless to say, we have grown up since then and have realized that our health and what we put in our bodies is far more important than we ever thought before. We joined, and picked up our first share on Friday.

I have had SO much fun researching veggies that I do not normally use or eat and finding uses for them that would satisfy our tastes. I would not necessarily say that the things I have cooked so far are "diet" foods, but they are delicious ways to add veggies to your menu and introduce more vitamins and minerals naturally.

Here are the first two veggie sides I have made using our local produce share.

Sautéed Swiss Chard with Bacon

1 large bunch of Red or Rainbow Swiss Chard
4 slices of bacon, cut into small pieces
2 tsp minced garlic
2 tbsp olive oil or butter

Wash Chard well and dry with a paper towel or salad spinner. Cut across into 1-2 inch strips. You can choose to use the stems or not. I used some and discarded the rest into my compost pile.
In a large skillet, cook bacon until done the way you like. Add the olive oil and garlic and cook until fragrant, about 1-2 minutes. Put Chard in the skillet and cook until tender, about 8-10 minutes, stirring regularly to incorporate the bacon and garlic.

So easy and so delicious!

The next recipe puts a delicious twist on your traditional Mashed Potato. In our produce share, we received Diakon Radishes. They look like a large white carrot, but have the taste of a radish.

For this recipe, you will need:
1 medium to large sized Diakon Radish
2 medium potatoes
1 tbsp minced garlic
2 tbsp butter
1/8 - 1/4 cup milk, depending on the desired consistency.
Salt and pepper to taste

Peel and cube potatoes and radishes and place in a large pot with the garlic. Cover with water and boil until fork tender. I found that the radishes did not get as tender as the potatoes, but the end result was still fabulous.
When cooked, drain the water, add the butter, half the milk and the salt and pepper. Use a potato masher to mash the veggies. Add more milk and stir to get the consistency you like in your mashed potatoes.


Not only am I feeding my family delicious meals, but I have been incredibly impressed by Urban Acres' online organization and their Pinterest board. They have a page for each veggie that you will find in your share with proper ways to prepare for storage and recipes for each. Makes experimenting with new things a cinch!

Stay tuned for more delicious recipes.

Dec 19, 2012

Homemade Baby Food.

I have posted on my Facebook a few times about making my own baby food. It never fails that I get comments like "You're making the rest of us look bad!" or "How do you have the time?" If these mamas knew how easy it was, they would not be saying such crazy things! So, let me take a moment and share the secrets of baby food making with the easiest choices - carrots and sweet potatoes.

Carrots -

You will need a steaming basket, a pot, carrots, water, and preferably an immersion blender. Let's talk supplies for a moment.

A cook is as good as her tools, right? Well, let me share with you a few of my tools that have come in incredibly handy. First the steaming basket. My mom always used one of the traditional metal baskets, but I found one on amazon that is far easier to use, clean and store.

The Chef'n Sleekstor Veggiesteam

It is a soft silicon that fits right into the pan. I don't know what I would do without this gem.

You will also need way to purée the veggies once they are cooked. I highly recommend an immersion blender. They are so easy to use, clean and make creating wholesome food a breeze. Plus, they can be used for a host of other cooking projects, not just baby food, like the Breeza or other baby food making devices. And if you needed another reason to get one, they are reasonably priced! I looked at a baby food maker when my first born was tiny, and I was shocked no find that they ran a couple hundred dollars. Well, $10 for the steamer and $32.75 for the blender is a much better price! Yes, that's right, $32.75 currently on amazon for the Cuisinart Immersion Blender.

Isn't it pretty? Mine is just silver - sure do wish they made the hot pink one when I was in the market a couple years ago!

Ok, now back to the food making!

1. Peel carrots and cut into chunks or slices.

2. In a sauce pan that will hold your steaming basket, bring one or two inches of water to a boil. You want the water to be just under the basket.

3. Place cut carrots in the steamer, set the timer for 10 minutes, put the lid on the pot, and go do something fun... Or wrangle your children if you are like me.

10 minutes later...

4. Drain the water, put carrots in a bowl and use your immersion blender to whip the heck out of those carrots. I love this part. I love the sound the machine makes, I love how the carrots squish out of the blender, haha. It's good fun. If you want thinner baby food, you can add a bit of water to obtain your desired consistency.

See, wasn't that easy??

Now, for sweet potatoes.

My preferred method of cooking sweet potatoes is by baking. It takes a bit longer, but I usually stick them in the oven while I am doing something else, so it isn't time wasted. You can also use the microwave, but for some reason "wholesome" and "microwave" just don't go together in my mind.

1. Wash the skin of the potatoes and poke a few holes in the potato.

2. Wrap potatoes in foil and bake at 400 for about an hour.

3. Peel or cut in half and scoop out the meat.

4. Again with the immersion blender.


Now, what do you do with the gobs of deliciousness that you have made? What I usually do is take a ice cube tray (a simple one that I got 2/$1 at the dollar store - don't feel the need to give in to the gimmick of ice cube trays with lids) and fill the slots with baby food. A lesson I learned the hard way - try to keep the food in the individual slots, not covering the whole thing. This helps for easier removal. Wrap in plastic wrap and freeze. The next day, you can pop the food cubes out and put them in a freezer bag so they are ready to go when you need them, and so you can make more food (or ice) if you so desire.

There are also baby foods that require no cooking or blending - try mashed up banana or avocado for an easy treat!

Not convinced? Let me break it down even further for you. Here are a few benefits of making your own baby food.

1. Cost - a jar of baby food costs about 85 cents for one serving. I spent about 60 cents for a half a pound of carrots and about a dollar for 2 sweet potatoes. This made about 10-12 servings! Hmm, $10 or $2?? The math is simple.

2. No additives, no preservatives, no extra sodium, organic and locally grown if you so choose. The health of our wee ones is important!

3. It's easy. My total work time for this project was about 15 minutes. And the hardest part is cutting the carrots!

4. You can SEE exactly what is going in to your baby's food. Choline bitartrate? Sure, choline is a good thing, but why do we need to add it to the food? Because the ingredients are not choice.

5. It's like crack. Baby crack. Healthy baby crack! Both of my girls gave noticeably more enthusiastic responses to home made baby food as opposed to jarred food.


Now, let me say - I still buy jarred food. It's easy to throw in the bag in case you aren't sure how long you'll be out. It's good for road trips - it offers an easy way to offer variety. But the bulk of what I feed my girls is mama made, and I highly encourage you to at least give it a shot!

Sep 15, 2012

Chicken and Wild Rice Casserole

I ran across a recipe for Chicken and Wild Rice casserole on Pinterest this week, but when I looked at the recipe, it looked very complicated and not very tasty. So, I decided to make up my own recipe and Wow! It turned out amazing - will definitely make this again. Here's the recipe:

1 - 6 ounce package long grain and wild rice mix
1 medium onion, chopped (1/2 cup)
2 tablespoons butter
1 can cream of chicken soup
1/2 cup white wine
1 tsp Italian seasoning
1tsp garlic powder
2cups shredded cooked chicken or turkey
1/3 cup finely shredded Parmesan cheese

1. Preheat the oven to 350 degrees.
2. Cook rice according to package directions.
3. Meanwhile, in a skillet, cook the onion with the butter until slightly translucent.
4. Add the soup, wine, spices, chicken and rice. Mix well.
5. Place in a 9x9 baking dish, sprinkle with the parmesan cheese and cook for about 35 minutes.

Enjoy!